Document signing
This section covers the following topics:
Document signing overview
Document signing happens in SignSpace spaces.
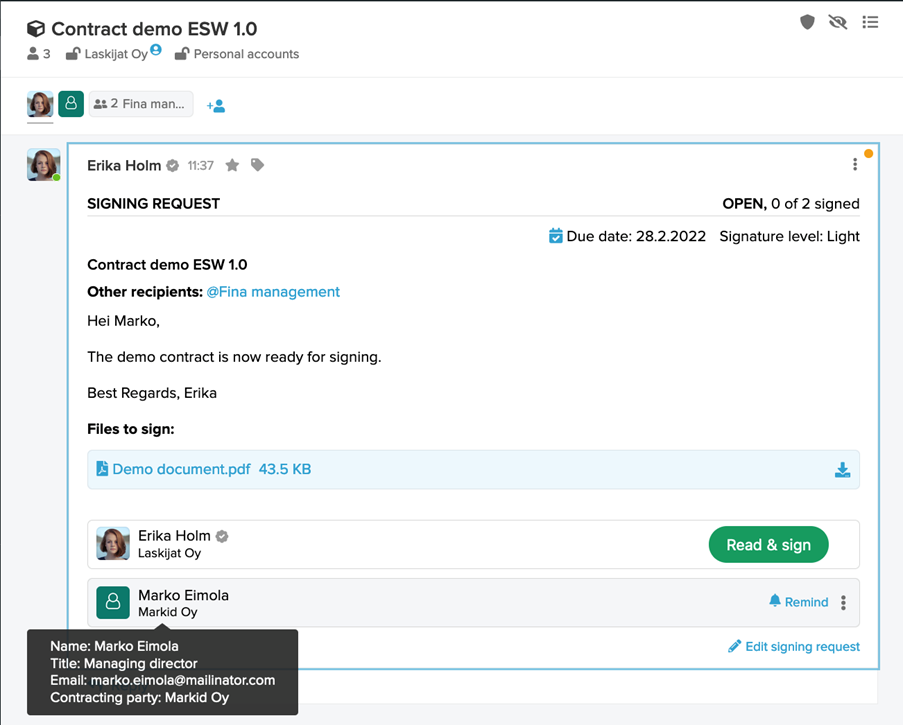
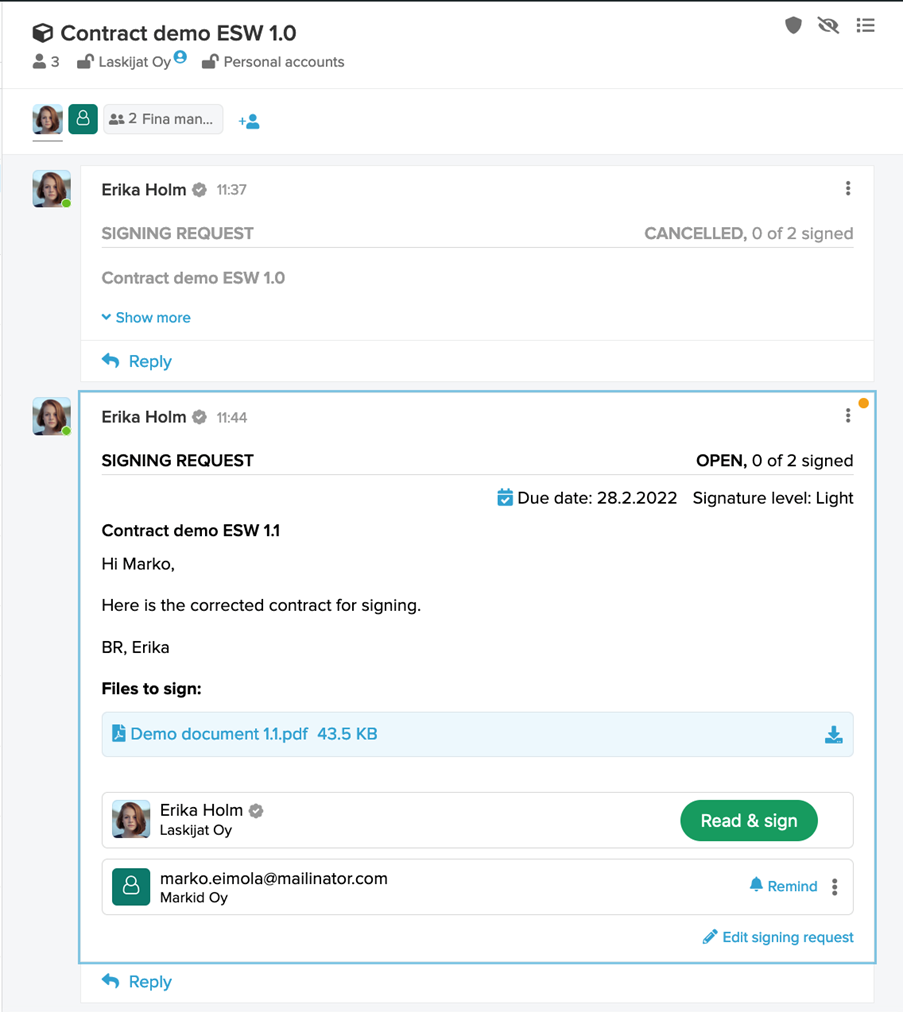
To start a document signing process, create a signing request. Signing request is an activity in a space where you attach files to be signed and invite signatories, to review the documents and sign them electronically. Signing request posted in a space looks like this:

Signing request may be created with no signing order (as in the example above) or it can have a set order for how signatories follow each other.

You may create a signing request in different locations on a space depending on what you are trying to achieve:
- You may start a new space by creating a signing request. If you would like to start a completely new collaboration by a signing request where only people who need to sign the document will have access, starting a new space with your signing request will suit best.
- You may post a signing request as a separate activity in an existing space (in SignSpace it is also called a separate branch in a space). For instance, if you are creating one of multiple signing requests related to the same long-term contract, it might be more convenient to have all of those signing requests in one space. But you still want to have a bit of separation between each signing request. In such case, use a separate activity in an existing space to post one of many related signing requests.
- You may also create a signing request from an external business application via SignApace API. For more information about how to create signing requests via API see https://dev.signspace.com/
Once a signing request is created, signatories will receive email notifications to sign the documents.

For existing SignSpace users email button View signing request leads the signatory to a space where signing request is located.

For signatories who are not registered users on SignSpace, email button View signing request leads directly to document preview and signing interface. Signatory can sign a signing request without registration and later optionally create a SignSpace account.

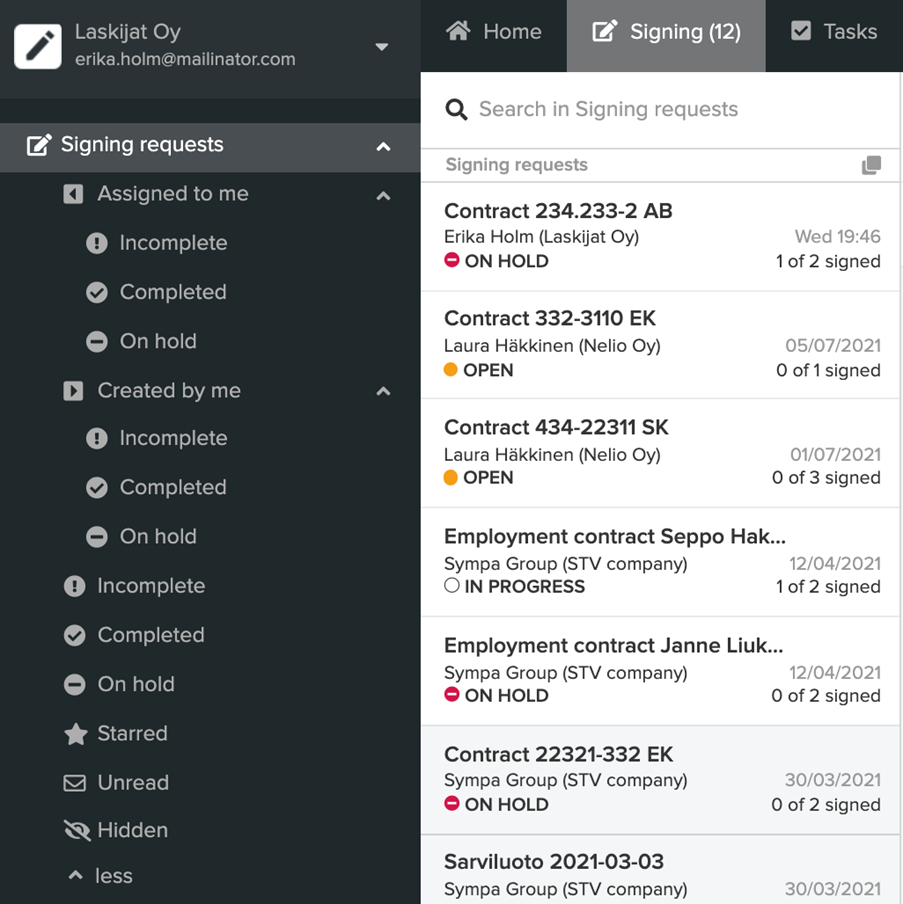
If you have many signing requests on SignSpace, there is a dedicated Signings view available from the top bar, which lists all the signing requests you have access to and provides a quick way to view each in a relevant space.

There are two signature levels on SignSpace. Creator of the signing request chooses the level relevant for each signing request.
If the Light level is selected, each signatory will be asked to identify herself/himself by means of email address verification either during SignSpace account registration or during signing by using a one-time security code that will be delivered to her/his email address.
If the Strong level is selected, signatory is required to identify herself/himself using strong electronic identification either during the signing event or earlier when applying for personal SignSpace advance electronic signing certificate. Strong electronic identification is carried out via the verification service by Signicat. Identity is verified via electronic IDs for Finland, Sweden, Norway, Estonia, Latvia, Lithuania. To verify their identities, signatories will need their bank or mobile electronic ID credentials.
When all the signatories sign a signing request, signed files become available in the space where the signing request was posted.

The signed files are also automatically stored in SignSpace for 10 years. However for convenience users may also download the files. SignSpace also has a verification service at https://www.signspace.com/verification.html where signature validity and document integrity may be verified.
Create a signing request
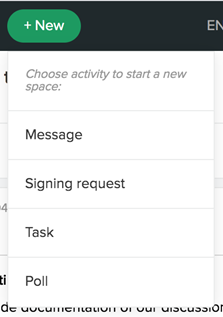
To create a signing request, click + New button and choose Signing request.
Fill in the signing request form.
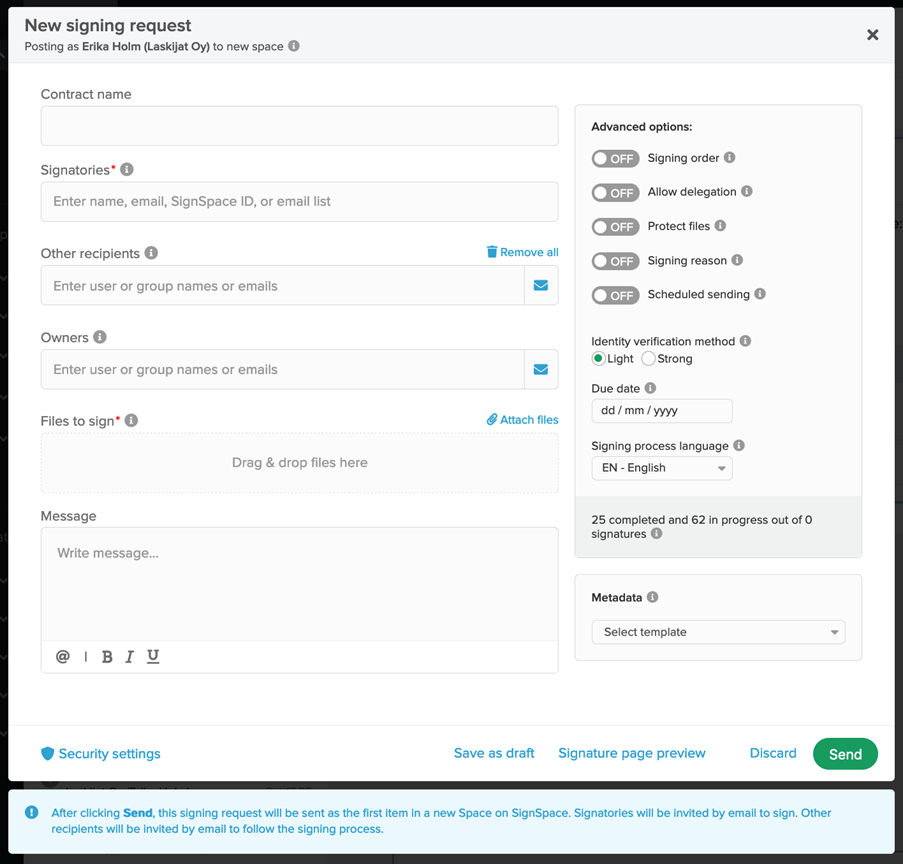
The Contract name is the title of the signing request and is displayed in the invitation email sent to the signatories.
Invite Signatories to sign the attached documents. When you enter signatory’s email address, name or SignSpace ID, the input field changes to the following format:

Signatory’s email address is displayed in the upper left column. If the signatory has a SignSpace account and this information is disclosed to you, the account name is displayed under the email address. If the signatory has several accounts in SignSpace you can choose which account to send the invitation.
Signatory email address is mandatory. The other Signatories information is optional:
- The signatory’s name can be provided if it is not pre-filled. If the name field is left empty, the signatory is asked to provide his or her name before signing. Applies to light authentication only. When strong authentication method is chosen, the full registered name of the signatory is displayed on the signature page instead of the manually filled name.
- If the signatory’s title is filled, it appears below the signatory's name on the signature page.
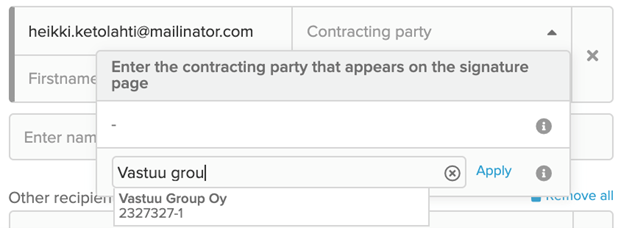
- The contracting party in the upper right corner indicates the organisation that the signatory represents and is displayed on the signature page. Select contracting party from the list if available, or enter the organisation name manually. When you start typing, matching organisations are suggested from the Finnish Trade Register. If the organisation is not Finnish or cannot be found, click Apply to fill the name you typed. Select "-" if you do not want to display this information on the signature page.
In the Other Recipients field, enter the users and groups to whom you want to grant access to this signing request.
Use the Owners field to add other users and groups which can edit and manage the signing request. You do not need to add yourself to the owner list, because as a creator you will automatically become the owner.
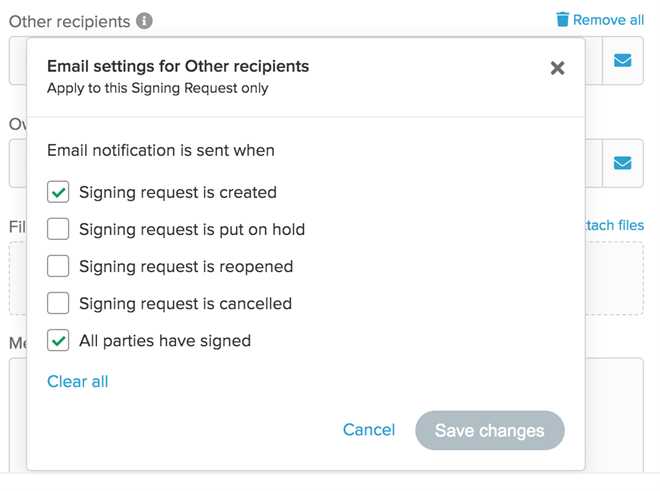
The other envelope icons at the end of the Other recipients and Owners input fields provide options for you to control when SignSpace sends email notifications related to the signing request to these roles.
Attach files to be signed in the Files to sign area. You can add up to 60 MB of files, and the most common file types are allowed. The order of the files to be signed can be changed by dragging and dropping them either on the signing request form or later in the file preview.
Provide a message to the participants in the Message field.
The advanced options provide more control over the signing request.
If you set Signing order ON in the advanced options, signatories will be invited to sign in the numbered order, which you define.
Allow delegation will allow signatories to delegate the signing request to another person in case they are not the right person to sign.
The Protect Files option adds access code protection to access the files. The access code ensures that a user who clicks on the invitation link has access to the email address to which the invitation was sent.
Use Scheduled sending to set the sending date. The signing request will be sent on the morning of the specified day at 6:00 AM. The signing request remains as an editable draft until it is sent.
Select the Identity verification method which will be required from signatories in the signing workflow:
- Light: signatory will be asked to identify herself/himself by means of email address verification either during SignSpace account registration or during the signing event by using a one-time security code that will be delivered to her/his email address.
- Strong: Signatory is required to identify herself/himself using strong electronic identification either during the signing event or earlier when applying for personal SignSpace advanced electronic signing certificate.
Add due date to indicate the deadline for completing the signing request and to automate sending of reminders. These reminders are sent 3 days before, 1 day before and when due date has passed.
You may specify if the signatories are allowed to sign after the due date. If signing is not allowed after the due date, the signing request will be automatically canceled at the end of the due date.
Email invitations are sent in the selected signing process language and is the language used on the signature page.
If you have metadata structures defined in your organisation, you can choose the template that best suits your needs and fill out the metadata.
Each new signing request is created in a new space, which role is to manage the permissions for the signing request and related discussions / activities. Edit the security settings to set the security level required for the content of the signing request.
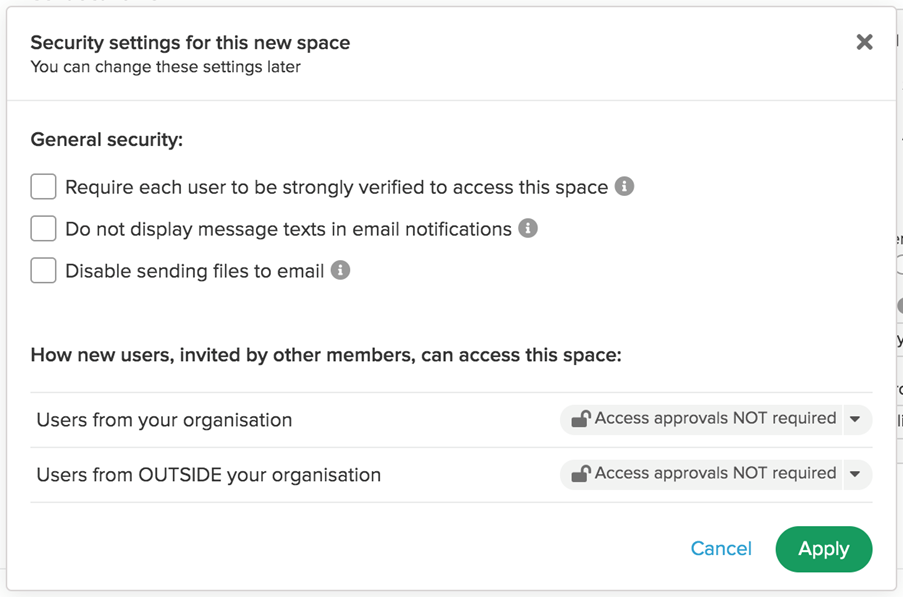
Detailed security options are described in the Space security section.
A signature page that contains information about signatures is created when all signatures have been collected. You can preview the draft signature page before sending the invitation to make sure all the information appears on the page as expected.
Once you have completed the signing request form, you can save it as a draft or send it immediately.
The saved draft will only be visible to you as the creator and other owners. Click Edit, make any updates, and click Send when you're ready to send the request.
Sending creates a new space that includes the signature request and email invitations to sign, and notifications of participation, will be sent.
Create a signing request in an existing space
There are number of reasons why you should create a new signing request in an existing space instead of a new space:
- Signing has already started and the documents need to be updated. You can cancel the previous signing request and create a new in the same space.
- You want to have the signed documents reviewed and signed in context and distributed to the same group of people.
- You must create an ad hoc signing request, such as an authorisation, to complete the existing signing process.
To create a signing request as a new activity in an existing space, click the 3 dots icon inside the bottom reply bar and select Signing request in the context menu.
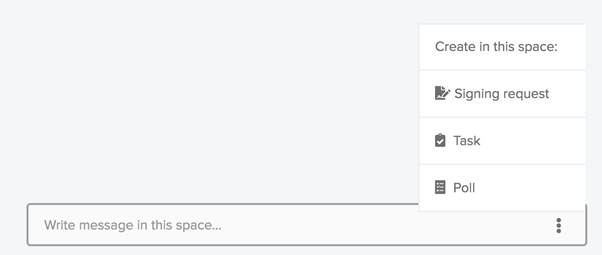
If you started typing in the reply, you will also see the Signing request link in the floating menu above the bottom reply bar.

You will be presented with a signing request form. Fill in the form.
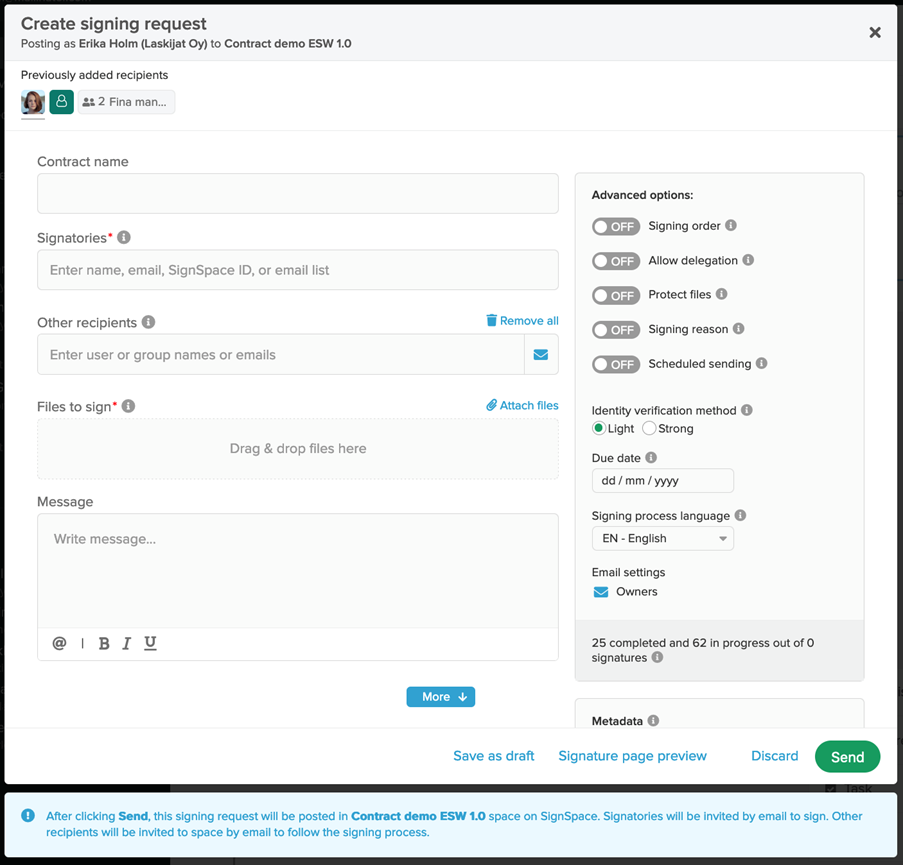
This signing request will be posted as a separate activity in the current space.
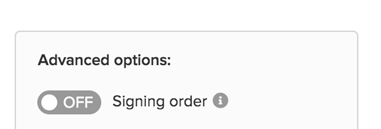
Signing order
Signing request form advanced option provide a choice for switching signing order on. By default the signing order feature is switched off. This means that all signatories will be invited to sign at once when the signing request is created.
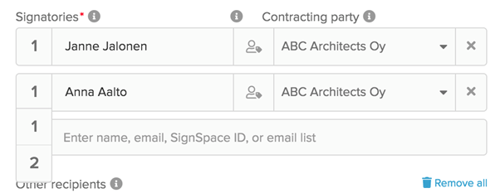
If you would like signatories to follow a defined order, set Signing order ON in the form. Then each signatory line will show a number, which you can change.

By default all numbers are 1s. Click on each number which you would like to change.
Once the signing request is sent out, all the signatories will be informed about the created signing request at once, but they will be allowed to sign only according to the numbered order.
If a signatory no.2 views the signing request when signatory no.1 has not completed signing, the signatory list will look like this and signatory no.2 will not be able to access the Read & Sign button.

Identity verification options
There are two identity verification options on SignSpace. Creator of the signing request chooses the option required for each signing request in the advanced options.

If the Light level is selected it is enough for a signatory to be identified by means of email address verification:
- For registered users, during SignSpace account registration
- For unregistered users, who sign without registration, during signing by using a one-time security code that will be delivered to their email address.
The Light level is easier and faster for signing, however it provides a lower assurance of signatory identity. Therefore for signatures, which require signatory identity to be verified strongly, there is another option called the Strong level.
If the Strong level is selected, signatory is required to identify herself/himself using strong electronic identification:
- For registered users, during every signing event, if the SignSpace Key mobile app is not used for signing.
- For registered users, only once, when applying for personal SignSpace advance electronic signing certificate through the SignSpace Key mobile app, if the SignSpace Key mobile app is used for signing.
- For unregistered users, who sign without registration, during every signing.
Strong electronic identification is carried out via the verification service by Signicat. Identity is verified via electronic IDs for Finland, Sweden, Norway, Estonia, Latvia, Lithuania. To verify their identities, signatories will need their bank or mobile electronic ID credentials.
All signatures created in SignSpace complies with the eIDAS Regulation (Regulation (EU) N°910/2014). More information about signatures in https://resources.signspace.com/legal-compliance
Sign a document if you are a registered SignSpace user
When you are invited to sign a document, you will receive an email notification.

Follow the email link to SignSpace space where the signing request is located.

To start the signing process, click Read & sign next to your name.

The document preview window will open.
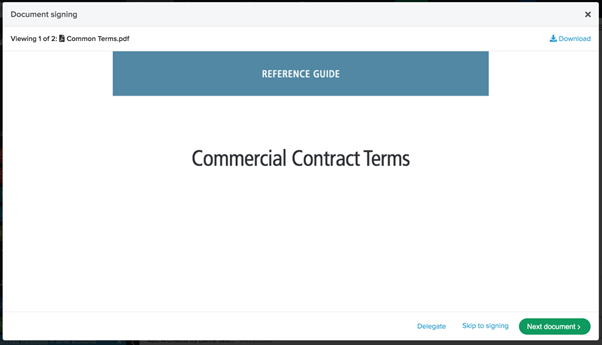
Read all the documents - there might be more than one document to review. For convenience, you can download documents for review. SignSpace allows to sign various file types and for some of the file types document preview might not be available. You will have to download such files for review on your computer.
If during document review you see that you are not the right person to sign this request, you have two options:
- Delegate the signing request
- Decline to sign
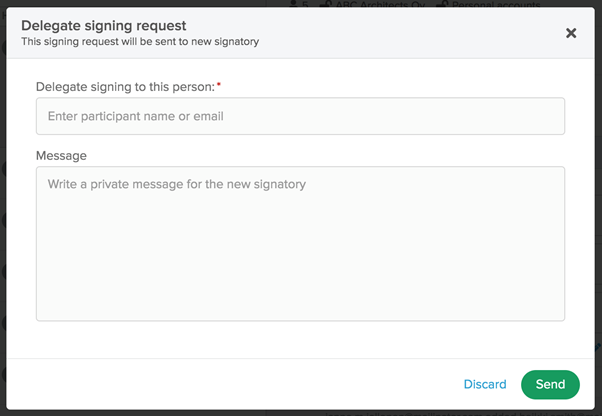
Delegate button is available on each page of the document review and on the last signature process page. Use this option if you know who is the right person to sign this. You will see a form where you need to fill in the name or email of the new signatory and provide an optional message for the new signatory. The message is private and will delivered to the new signatory in the email invitation.
Decline to sign button is available on the last signature process page. Use this option if you cannot sign and do not know who would be the right person to sign. Signing request will be placed on hold (the signing request owner can reopen it if needed) and your signature status will change into this:

If you are the right person to sign, after reviewing all the documents, click the Proceed to sign button.
On the last step of document signing, click the button Sign 2 documents now.
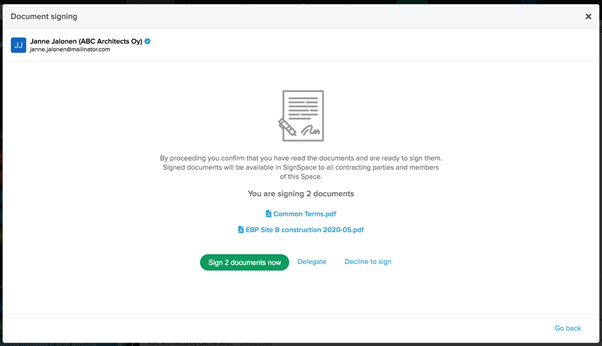
In this example a Light signature level was selected when creating the signing request so strong electronic identification is not required. As soon as SignSpace processes your request you will automatically go back to the space where the signing request is posted.
You can see that the signing request status next to your name has changed to Signed.

In case the Strong signature level is selected, when you click Sign 2 documents now the process will be different. For Strong signatures strong electronic identification is required. The most convenient way to handle this is to use SignSpace Key app for signing. If you are already using the app, you will receive a push notification to your mobile phone with the signing request. Press Sign button and provide your phone passcode or Touch ID to sign. As soon as SignSpace processes your request you will see the Signing complete information screen on your desktop.

If you are not yet using the SignSpace Key mobile app, you will see this screen, suggesting to install the app. Enter your email and click Email me the download link. To continue signing on the web click Close this pop-up.

App install link will be emailed to your inbox. The desktop screen will change to these instructions.

Open your email inbox on your mobile phone and install the app. As indicated in the instructions, after install you need to sign in to your SignSpace account in the mobile app. Then you need to carry out strong electronic identification. This is done through Signicat service and you only have to do it once. Identity is verified via electronic IDs for Finland, Sweden, Norway, Estonia, Latvia, Lithuania. To verify your identity, have your bank or mobile electronic ID credentials ready. Your app is ready for signing when you see this screen.

When your app is ready, a push notification with a signing request will be sent to your mobile phone.

Press Sign button and provide your phone passcode or Touch ID to sign. As soon as SignSpace processes your request you will see the Signing complete information screen on your desktop.
In case you are not using a smartphone or do not have access to it at the moment, you can continue signing using SignSpace web application. However in this case every time you need to sign for a Strong level, you will be asked to carry out strong electronic identification.

Strong electronic identification is carried out via identity verification service by Signicat. Identity is verified via electronic IDs for Finland, Sweden, Norway, Estonia, Latvia, Lithuania. To verify your identity, have your bank or mobile electronic ID credentials ready.

Once you are back to SignSpace after verifying your identity, click the Sign 2 documents now button again to resume signing.
You will see a notification that you completed the document signing and you will be back in the space where the signing request is posted. You can see that the signing request status next to your name has changed to Signed.

Note! If you are not the last person to sign, the document attached to this signing request still does not show your electronic signature. If you view or download the document now, you will not see any signatures in it. The document signatures become visible only when all the signatories have signed. You will be informed by an email message when all the signatories have finished signing and the documents with the electronic signatures are ready for downloading.
Sign a document without registration to SignSpace
When you are invited to sign, you will receive a notification in your email.
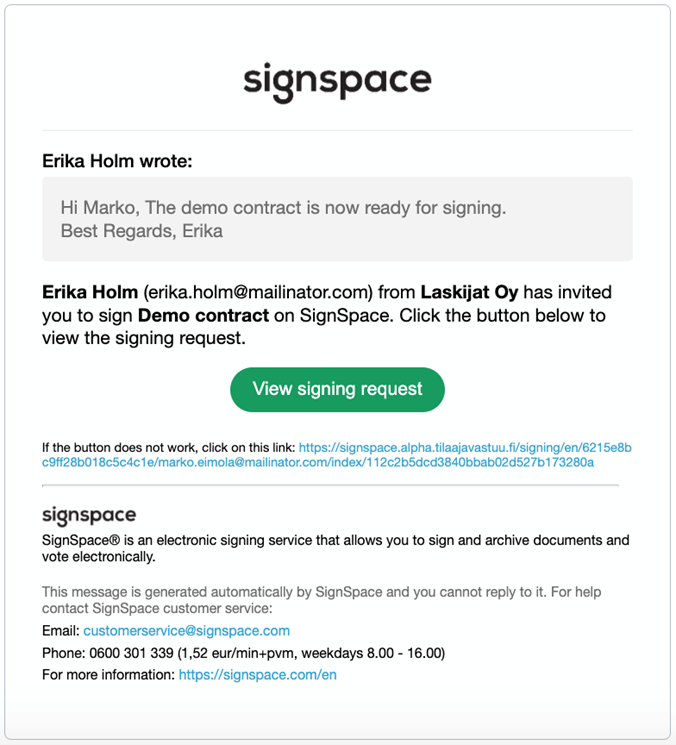
Proceed to sign by clicking View signing request.
If you have registered a SignSpace account in the past, you will need to log in to your account and sign from there. If you are not a registered user, you will be directed to the signing process.
Access to the documents may be protected by a security passcode. In that case you will be asked to enter the passcode, which is sent to your email.
If the signing process is not passcode protected, you will be directed to view the files. SignSpace allows to sign various file types and for some of the file types document preview is not available. You will have to download such files for review on your computer.
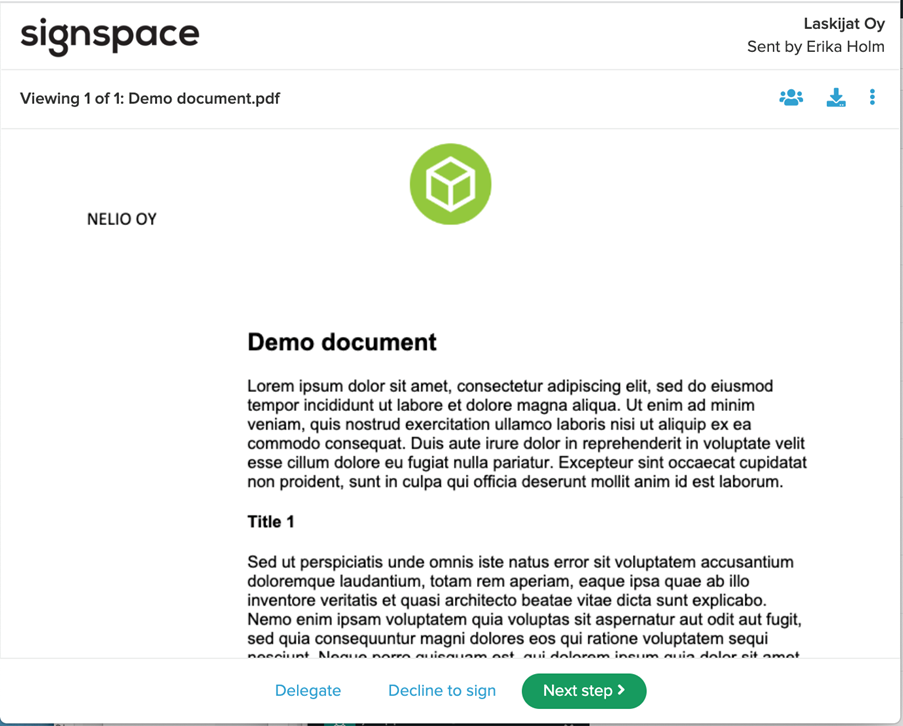
If you are not the right person to sign these files or there are changes needed to the files, you have two options depending on the settings made by the inviter:
• Delegate the signing request
• Decline to sign
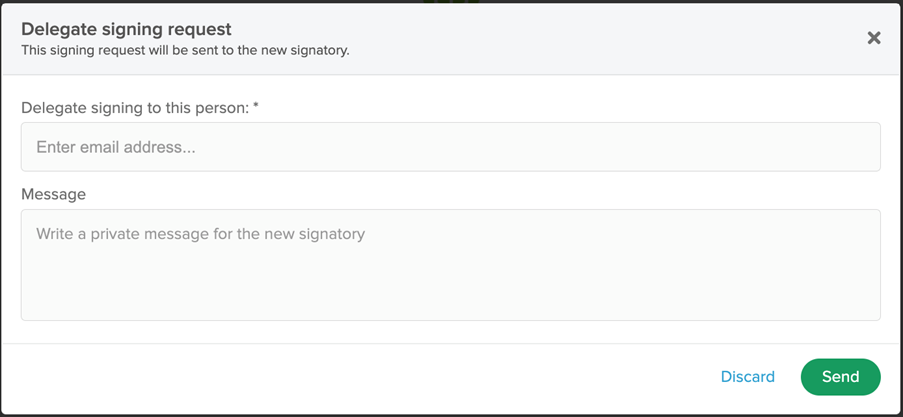
Delegate button is available on each page of the document review. Use this option if you know who is the right person to sign. You will see a form where you need to fill in the email of the new signatory and provide an optional message for the new signatory. The message is private and will delivered to the new signatory in the email invitation.
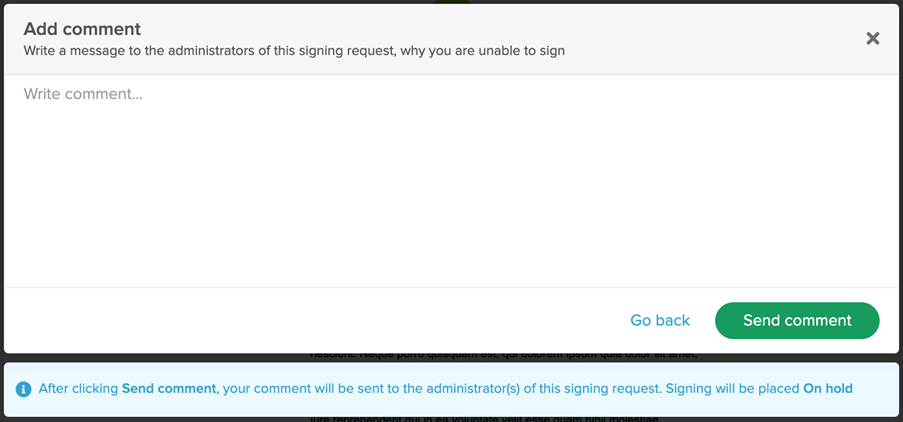
Decline to sign button is available on each page of the document review and on the last signing process page. You will be asked to provide a comment about why you cannot sign this signing request. The comment will be posted to the creator and other owners of the request. The signing request will be placed on hold and the creator / other owners will be notified about your action.
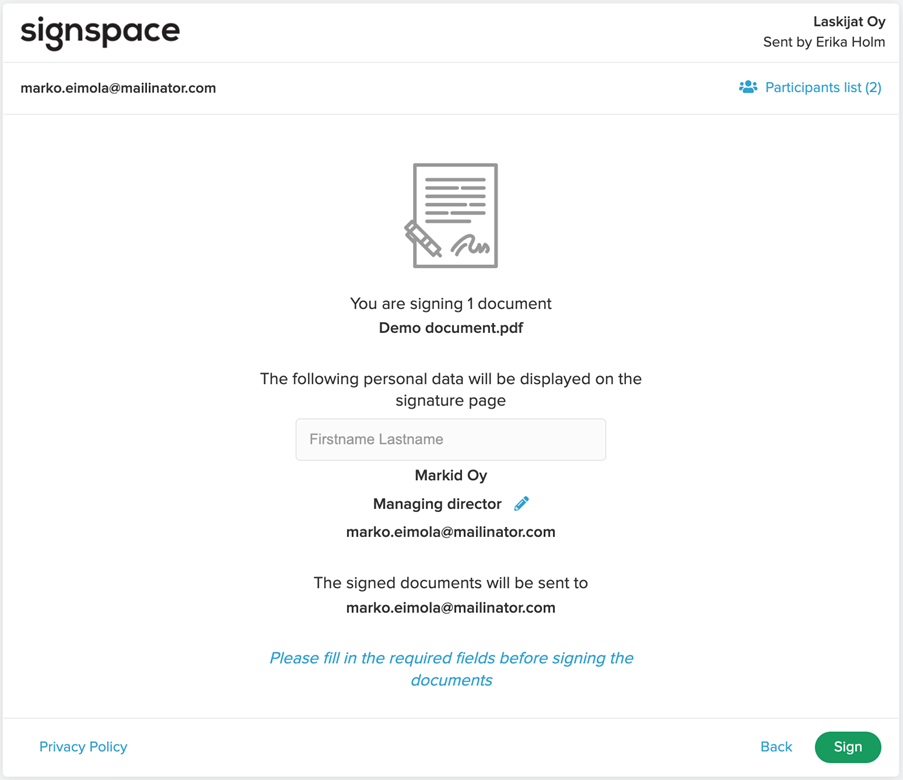
Once you are ready to sign the documents, click Next step and a summary page will appear. Enter your official name if asked, review / edit your personal information, and click the Sign button when you are ready to sign.
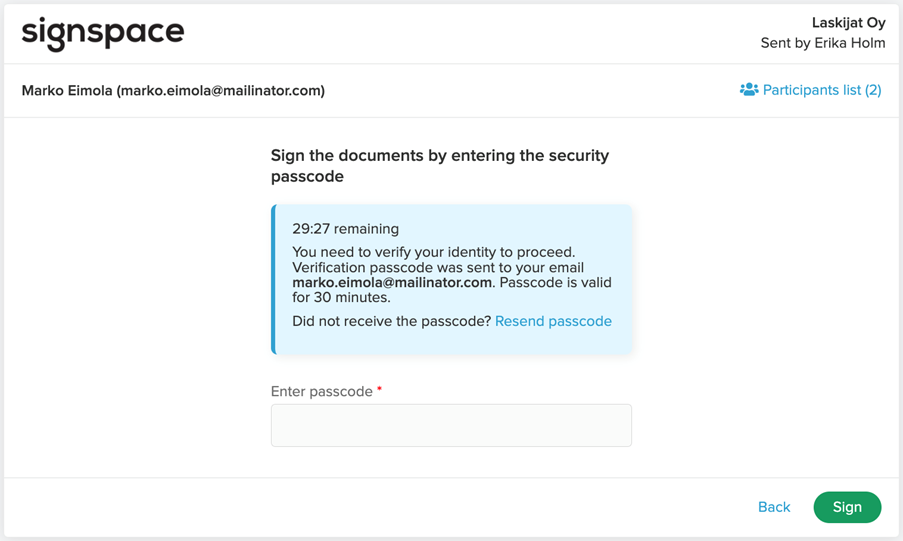
If the required identification method is Light, you are asked to get the passcode from your email and enter it to the Enter passcode field.
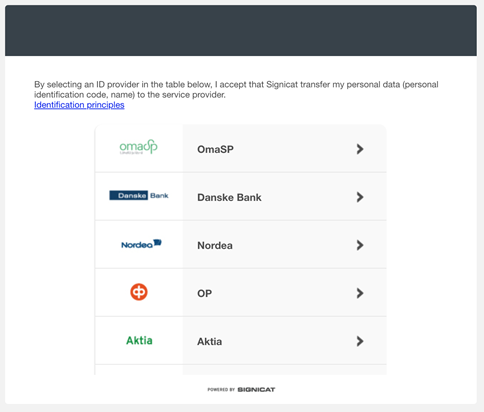
If the required identification method is Strong, you will be asked to carry out strong electronic identification. Strong electronic identification is carried out via identity verification service by Signicat. Identity is verified via electronic IDs for Finland, Sweden, Norway, Estonia, Latvia, Lithuania. To verify your identity, have your bank or mobile electronic ID credentials ready.
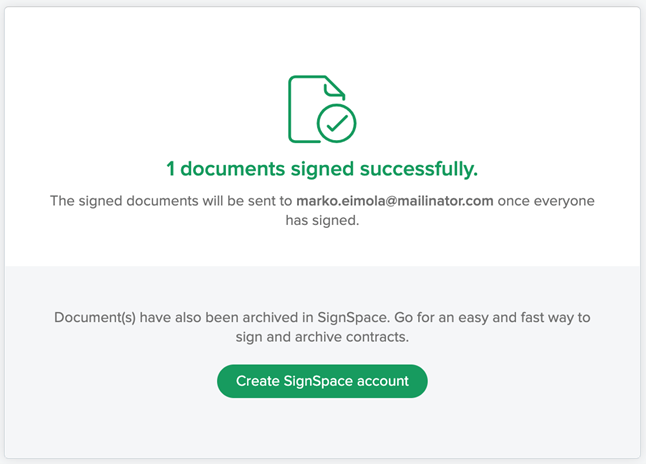
After the identity verification a page is displayed to inform that you have successfully completed the signing. Signed files will be emailed to you once all parties have signed. If you decide to create a SignSpace account with the same email address, you'll also find signed files there.
Batch signing
Instead of signing each request separately, you can choose to sign multiple signing requests with a single authentication.
On the Signing tab, select the multiple checkboxes icon, and a check box appears next to each signing request.

Select the requests you want to sign and click Sign selected.
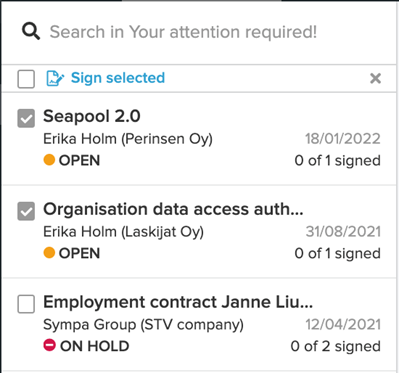
You can sign up to 10 signing requests at a time.
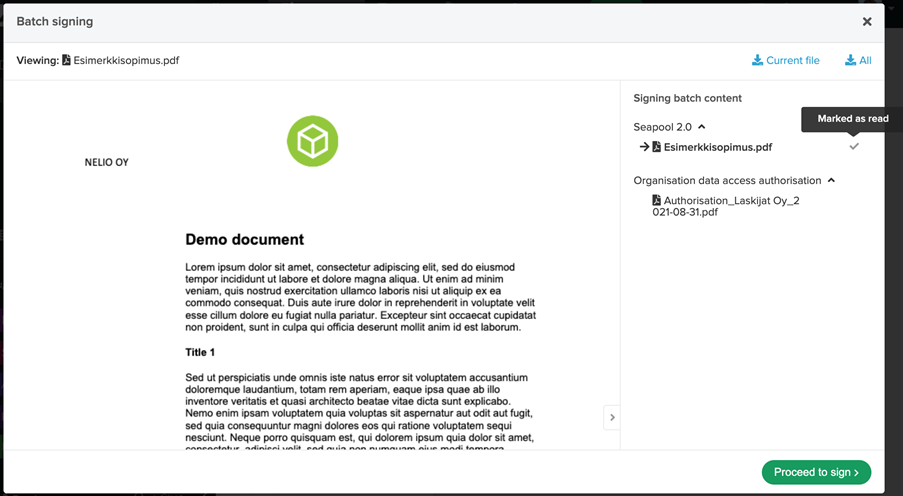
In the next step, the files attached to each signing request can be read / downloaded. A gray check mark indicates the files you have viewed during file preview. This will help you keep track of what files you have read.
When you're done with reading, click Proceed to sign
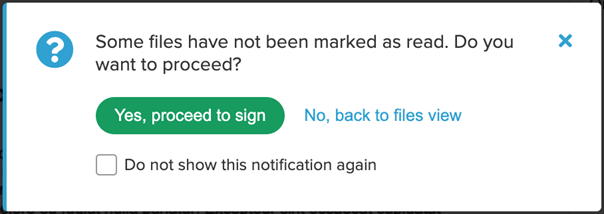
If you have not viewed all the files, a message appears stating that not all the files have been read. You can continue if you are ready to sign, or return to view the files.
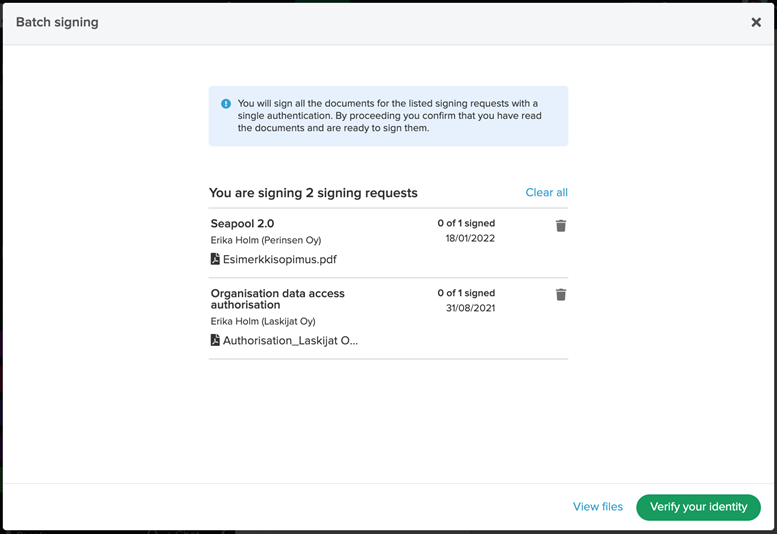
On the summary page, you can make sure the content you sign matches what you read. You can still remove signing requests from the batch before continuing with signing.
If a request requires strong authentication, you will be directed to strong authentication. Click Verify your identity to sign. If all signing requests are light, click Sign <nr> Signing Requests to sign.
Edit signing request
If you are the owner of a signing request you can edit the posted signing request. Click Edit signing request link at the bottom of the posted signing request.
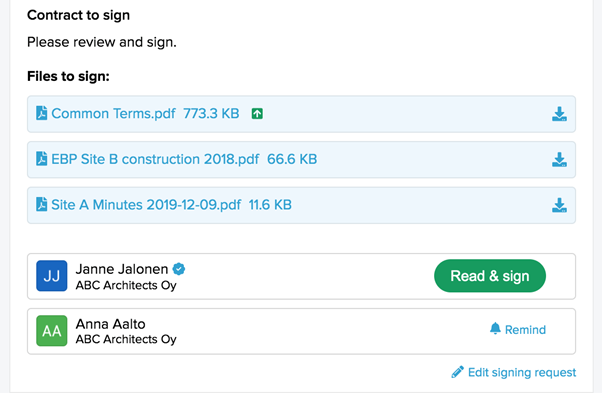
Editable form will open.
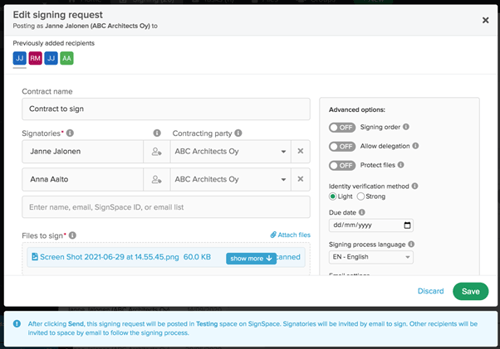
You can change contract name, remove current signatories if they have not signed yet (it is not possible to remove a signatory, who already signed, add new signatories, add other recipients or signing request owners, change the message text. When done with the changes click the Save button and the signing request will be updated (the new participants will also receive respective invitations related to this signing request). The text fields (such as contract title or message text will have (edited) notification next to them.
You can also control the advanced options in the editing form. For instance you can switch the signing order on and off.
Share unique signing request links
In case the default signing request invitation sent by SignSpace system is not successful for any technical reasons, the creator of the signing request has access to the unique links of each invited signatory. Click on the 3 dots on a specific signatory line in the posted signing request and the context menu will provide the option to copy the link. Click the menu item and the link will be copied to your PC clipboard. Now you can paste it in another tool for sharing: email, chat, etc.

Unique link is available only for signing requests in which identity verification method is set to “Light”.
Note! This functionality is security sensitive, because the unique link identifies a specific signatory. Make sure that you are sharing each link only with the correct participant over a secure channel and only do that if the default SignSpace sharing mechanisms do not work.
Putting the signing request on hold, cancelling or reopening it, and changing its status to completed
Signing request owner may cancel a signing request, which is no longer relevant. This option is available in the context menu of the signing request.

Signing request owner may reopen a canceled signing request at any time. This option is available in the context menu of the signing request.

Any user may set a signing request on hold. This option is available in the context menu of the signing request.

Signing request is also put on hold if a signatory chooses a Decline to sign option when signing.

Signing request owner may reopen the signing request which is on hold or cancel it, if it is no longer relevant. These options are available in the context menu of the signing request.

If a signature cannot be collected from all invited signatories and you wish to have the document signed with the already collected signatures, you can change the status of the signing request to completed by selecting “Set to completed” from the context menu of the signing request. Persons who have not yet signed the document are deleted from the signing request and will be notified of this by email.
View signing request history
Signing request history is available in the context menu of the signing request.

It opens in a modal window and lists the key activities related to content or status change of the signing request.

View signed documents
Viewing signed PDF files
When all the signatories have signed a PDF file on SignSpace, a signature page is affixed at the end of the PDF file.
A completed signing request with PDF files looks like this

For PDF files you can click the file attachment and preview the signed PDF file online (the signatures are in the last page of the document). You can also download each PDF file separately to your computer. Or you can click Download all files with signatures link and a zip archive with all the signed files will be downloaded to your computer.

Viewing signed non PDF files
When all the signatories have signed a non PDF file (e. g. Word, Powerpoint, Excel, image or video file) on SignSpace, a ZIP file is created. It contains both the original file and a PDF signature page.
A completed signing request with non PDF files looks like this (each signed file is zipped with its signature page).

You cannot preview these zip archives online, but you can download each zip separately to your computer to view it. Or you can click Download all files with signatures link and one zip archive with all the original files and their PDF signature pages will be downloaded to your computer.

Verify signed documents
The document verification service enables you to check the integrity of documents signed on SignSpace. The service is provided at https://www.signspace.com/en/verification. To perform document verification you need to have the file and its signature information. The signature information might be in different formats:
- A page attached at the end of a PDF document
- A separate PDF document
The easiest way to make sure you have all the necessary information for verification is to click the Download all files with signatures link in a completed signing request.
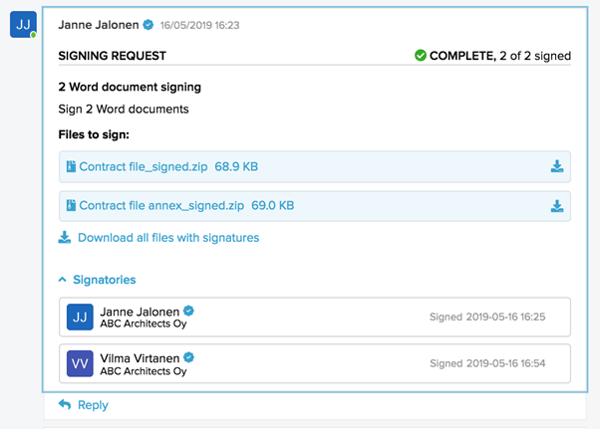
One zip file will be downloaded to your computer. Keep this zip file for future reference and when you need to verify the signatures, upload that zip to the verification service page at https://www.signspace.com/en/verification.

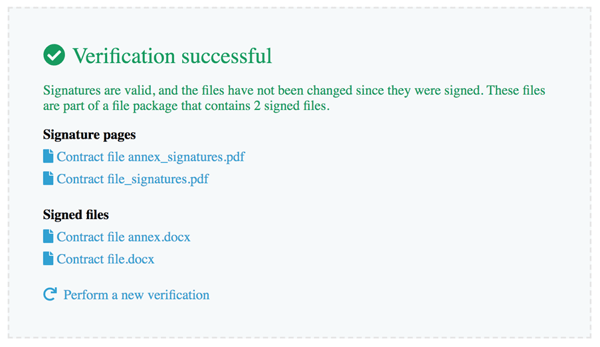
When you upload the zip, you will see the verification result:
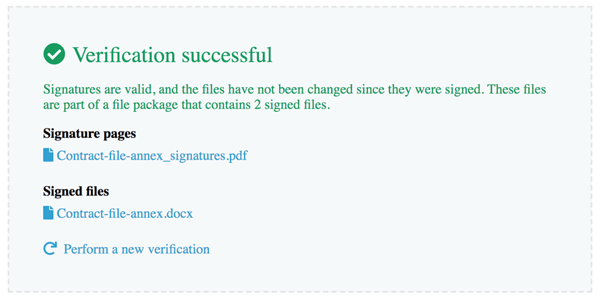
You could also upload just one of the files from the zip file for verification, but in that case you need to know precisely where and in what format the signature information is contained (otherwise you will receive an error message). The following results show verification for one file, but inform you that this file was signed as part of a package containing 2 documents.
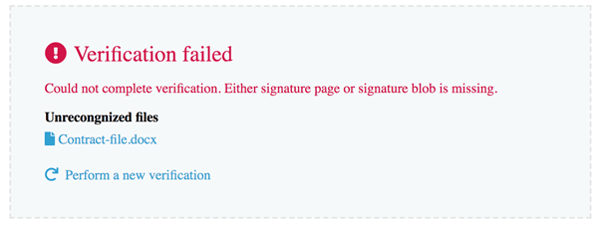
If you do not upload the relevant signature information with the signed file, you will see this or a similar error message. To avoid such situations, using a downloaded zip is a recommended solution.
Filtering and search
Predefined filters, tagging, and free text search makes it easy to find the needed signing requests you need.
The filters are located on the side bar. Select a filter that supports your search and the corresponding signature requests that match the filter will be listed. You can refine the search by selecting the icon next to the filter name. Additional filters are displayed. You can also refine your search by adding any previously used tags to the search box or by using free text search.
TIPS:
- List the signing requests that are waiting for your signature by selecting the "Assigned to Me" -> "Incomplete" filter.
- List the uncompleted signing requests created by you by selecting "Assigned toCreated by Me" -> "Incomplete" filter.
NOTE: The “Incomplete” filter does not include the Signing requests set on hold. Use the “On hold” filter to list any Signing Requests set on hold.
