Groups
This section covers the following topics:
Groups overview
A group is a list of individual users or other groups bundled together to make it easier to reach multiple people at once. You can create groups for your organization, or for multiple organizations. You may also include personal account users in a group. You may even include other groups in a group.
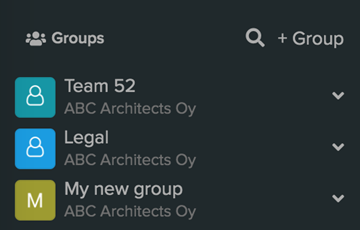
Your groups are listed in the sidebar Groups shortlist for quick access. If you have multiple accounts, only the groups for currently selected account are visible in this list.
A full Groups list with all group details is located in a separate Groups view.
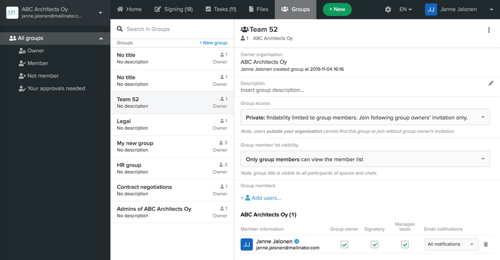
A person creating a group becomes the group owner. Group management page for each group looks like this. Only the group owner has the right to manage the group.
Create a group
The new group will be created in your currently selected account. Check the sidebar to make sure you have selected the correct account if you have more than one SignSpace account.
With the Home view selected in the top bar click + Group in the Groups shortlist on the sidebar.

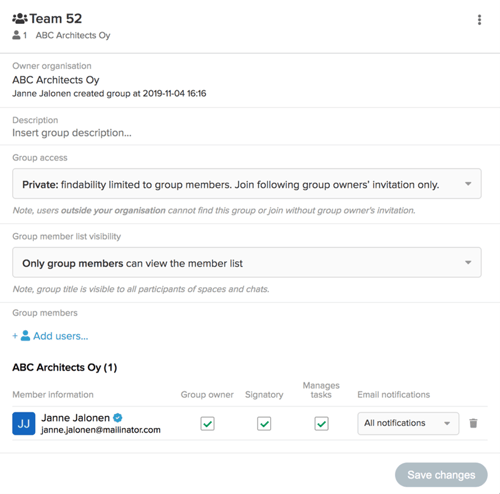
In the new group management page fill in all the information for the group and add group members.

The Group access field allows to select privacy level of the group:
- Private group is shown in your groups list only if you are a group member. Joining a private group is possible only by invitation from the group owner.
- By approval group is discoverable in the groups list to anyone in the same organization as the group owner. Requesting to join the group is also available to anyone in the same organization as the group owner. However the request needs to be approved by the group owner for you to become a group member.
- Without approval group is discoverable in the groups list to anyone in the same organization as the group owner and anyone from the same organization can join the group without additional approvals.
Users from outside the group owner organisation cannot find or request to join any of the above group type from the group list. Users from outside the group owner organisation can become group members only by invitation from the group owner.
The Group member list visibility field allows to select who can see the group member list names. This applies to various contexts, for instance in a space or a chat member list where a group listed is a member. Available options allow choosing between:
- only that group members
- that group members and the group owner organization users
- everybody

Once you have listed all the needed participants, click the Add button.

And new group members will be added to the group.

By default a new group member is added to the group without special rights. The group owner can then add the needed rights and settings for that user:
- Group owner - grants the user with all standard group management rights, such as adding and removing members, and changing group settings.
- Signatory - allows the user to be one of the people who have the right to sign a signing request in the name of the whole group when a group is listed as a signatory.
- Manages tasks - allows the user to be one of the people who have the right to complete a task in the name of the whole group when a group is listed as an assignee on a task.
- Email notifications – allows the user to manage which email notifications the user receives as a member of the group. By default, the user receives all email notifications related to the group (this default option cannot be changed if the user is a Signatory or has a Manages tasks role). Other options include: Nothing – no email notifications are sent to the group member; Only when signing is complete – the group member receives email notifications only when signing has been completed by all participants. Note! Each user is also able to manage their own email notification settings on this page within the functional limitations described above.
When you return to the Home view, the newly created group is available in the Groups shortlist on the sidebar.

Remove a group member
Only the group owner can remove a group member from a group.
Go to the Groups list by selecting the Groups view in the top bar (make sure you have a specific account selected in the sidebar accounts menu if you have more than one account). In the group management page find the group member you need to remove and click the Trash icon on the right side of that group member line.

The group member will be removed from the group and lose access to any of the information (spaces, chats, files) that was available to them through this group.
The removed group member can be added back to the group at any time.
Leave a group
If you no longer need to be in a group, you can leave a group. Click the settings icon in the top right corner of the group management page and select Leave this group.

You will be asked to confirm that you want to leave the group. When you leave the group, you will lose access to any of the information (spaces, chats, files) that was available to you through this group. In case you need to be added to the group again later, you will have to go through the joining process depending on the group access type.
If you are the only group owner and would like to leave a group, you will first need to assign the group ownership rights to another group member. If you have not done so, you will see this notification when trying to leave the group.

Close a group
Group owner can close a group from the context menu at the top right corner of the group page. Group members are informed about group closing with a notification.

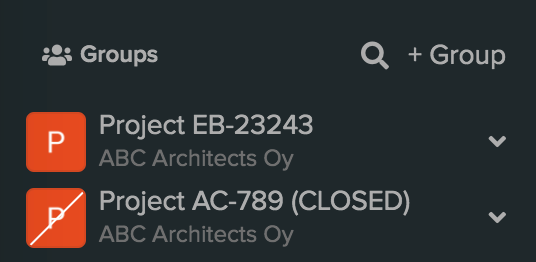
When a group is closed, content cannot be shared with it any longer. But closing a group will not delete it. Closed groups are still visible across SignSpace UI, only marked as CLOSED, and they can be used as reference to find information.
In the Home tab sidebar they will appear with a crossed out icon.
All closed groups are listed under Closed groups filter in the sidebar of the Groups tab.
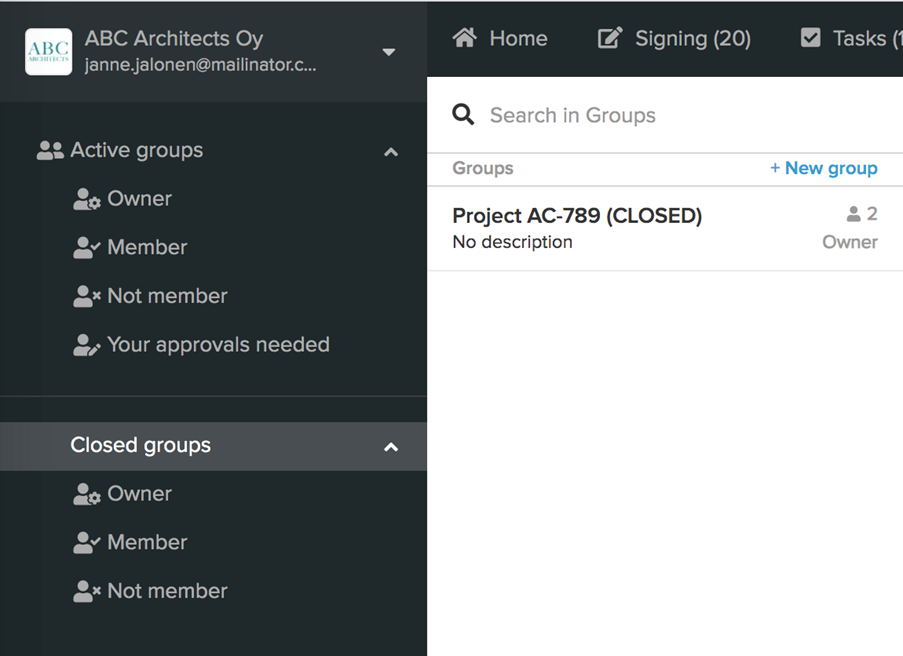
Closed group can be reverted back to active by a group owner.

Add a group to space, signing request or task
To add a group to a new space when creating a new space, start typing the group name in the Recipients field and select it from the auto-suggestion list.

To add a group to an existing space, go to the list of the space members - accessible in the space header by clicking the space member number or any of the participating organization names. Click + Add users or groups, start typing the group name and select it from the auto-suggestion list.

To add a group to a new signing request or a new task, in the creation from start typing the group name in the Signatories field for a signing request or the Assignees field for a task, and select it from the auto-suggestion list.

The selected group will be added to the input field.

You can split this group into individual signatories or individual assignees by clicking the split icon in the right corner of the input field.

Select the menu item and the group will be split into individuals.

Chat in a group
This functionality allows you to chat inside the group in which you are a member.
When you are in the Home view, in the sidebar click on the group in which you would like to chat. The Home list will be automatically filtered to show only the spaces and chats where this group is participating. The group chat to which only group members have access will be at the top of the list.

Filter content by group
When you are in the Home view, in the sidebar click on the group name you are interested in. The Home list will be automatically filtered to show only the spaces and chats where this group is participating.

Mute a group
If you are a member of a group, but would not like to receive all the notifications from it, you can mute a group. Select that group name in the sidebar, open the context menu (down arrow) and select Mute group. All the group’s information will be still available to you in SignSpae, but you can review it at your own pace when needed without being disturbed by constant notifications.
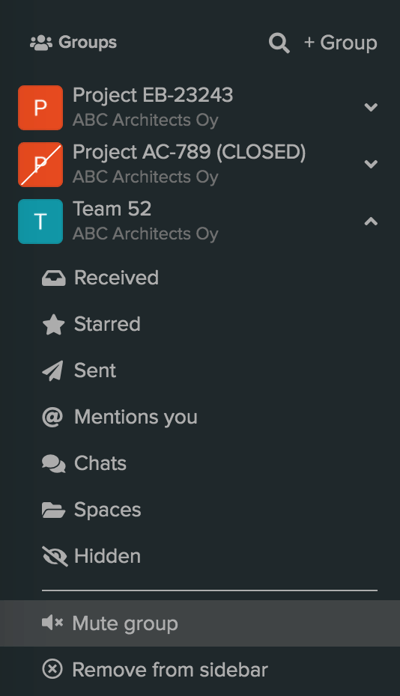
Manage group shortlist
If you no longer wish to see a specific group in your sidebar shortlist you can remove it. Select that group name in the sidebar, open the context menu (down arrow) and select Remove from sidebar. The group will no longer be visible in your groups shortlist. When you need this group again, open the search field at the top of your groups shortlist block, enter the group name, click on that group name and it will be added to your shortlist again.
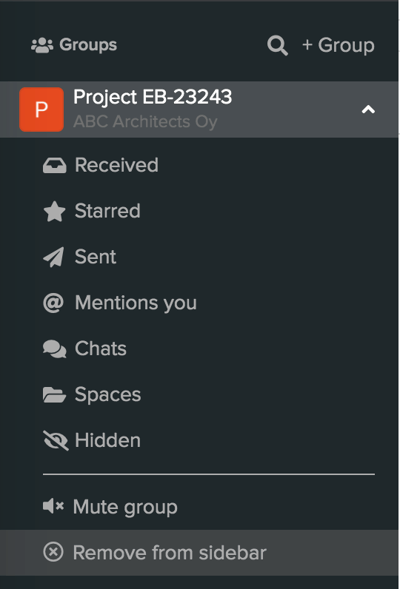
Copy group address
You can copy the address of the group onto the clipboard and share it with external users to whom it is not visible in the service.

